DIY Solar Panel Wiring Through Roof: A Step-by-Step Homeowner’s Guide
Why DIY Solar Panel Wiring Matters
Solar energy has exploded in popularity across the U.S., with more than 4 million households expected to have solar panels on roof systems by 2030. While professional solar roof installation is common, some homeowners want to take the DIY route to save on costs and gain hands-on control.
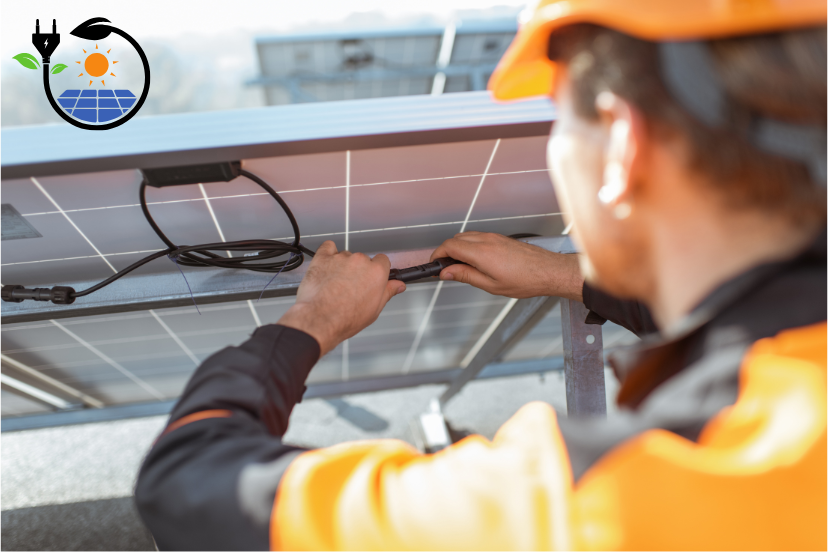
One of the most important aspects of a safe and successful installation is solar panel wiring through the roof. Done correctly, wiring keeps your system efficient, code-compliant, and weatherproof. Done poorly, it can cause roof leaks, electrical faults, or even fires.
This Solar Roofing Guide breaks down the essentials of DIY solar panel wiring roof projects. We’ll cover how wiring works, what tools you need, step-by-step installation tips, safety guidelines, and ongoing maintenance.
What Is Solar Panel Wiring Through a Roof?
Solar panel wiring involves connecting panels on your roof to the inverter and your home’s electrical system. Wires must pass through the roof surface safely, without creating leaks or violating code.
Key Components in Solar Wiring
-
PV Wire or Cable: Special sunlight- and weather-resistant wire designed for solar panels.
-
Conduit: Metal or plastic tubing to protect wires as they pass through the roof and attic.
-
Roof Flashing: A waterproof seal to prevent leaks where wires enter the roof.
-
Combiner Box: Consolidates wires from multiple panels before connecting to the inverter.
-
Inverter: Converts DC power to AC for household use.
For asphalt shingle solar compatibility or metal roof solar panels, wiring techniques differ slightly, but the principles remain the same: protect wires, seal the roof, and maintain electrical safety.
Tools and Materials Needed for Solar Panel Wiring Roof Projects
Before starting, gather the following:
-
Drill with a hole saw attachment
-
Roof flashing and sealant
-
EMT or PVC conduit with fittings
-
Wire pulling tools (fish tape)
-
UL-listed PV wire (10–12 AWG typical)
-
Grounding wire and clamps
-
Junction or combiner box
-
Conduit straps and roof mounts
-
Safety gear (harness, gloves, eye protection)
👉 Always check with solar roofing companies near me for local code requirements before purchasing materials.
Step-by-Step: DIY Solar Panel Wiring Through a Roof
1. Plan Your Wiring Path
-
Map where your panels, inverter, and breaker box are located.
-
Keep wiring runs as short as possible to reduce power loss.
-
Avoid sharp bends and shaded areas.
2. Drill Roof Entry Point
-
Choose a spot near the solar panel roof mounts for minimal exposure.
-
Drill a hole slightly larger than your conduit.
-
For tile roof solar panels or flat roof solar panels, use manufacturer-specific flashing kits.
3. Install Roof Flashing and Conduit
-
Slide flashing under shingles or attach to standing-seam metal roof panels.
-
Insert the conduit through the roof hole.
-
Seal with roof-safe caulk to prevent leaks.
4. Run Solar Wiring
-
Feed the PV wire through the conduit into the attic.
-
Secure wires with conduit straps along rafters.
-
Connect wires to the combiner box or directly to the inverter.
5. Ground the System
-
Attach the grounding wire to the metal roof sections and the solar panel mounts.
-
Run a grounding conductor to a ground rod as per the NEC code.
6. Connect to Inverter and Breaker Box
-
Connect positive and negative wires from the combiner box to the inverter.
-
Tie the inverter output into the home’s breaker panel using a licensed electrician.
⚠️ Note: In most U.S. states, the final grid connection must be completed or inspected by a licensed professional.

Safety Precautions for DIY Solar Wiring
-
Always turn off the main power before connecting wires.
-
Wear insulated gloves and safety glasses.
-
Never drill into rafters, plumbing, or electrical lines.
-
Follow NEC (National Electrical Code) and local building codes.
-
Use only UL-listed components designed for solar roofing.
Pro Tip: Even if you’re comfortable with DIY solar roof installation, consider hiring a pro for the final wiring into your breaker box.
Costs: DIY vs Professional Wiring
-
DIY solar panel wiring roof materials: $300–$800
-
Professional installation (labor + permits): $2,000–$5,000
-
Full solar roof cost estimate (5kW system): $15,000–$25,000
DIY can save thousands, but comes with higher responsibility for safety and compliance.
How Solar Panel Wiring Affects Roof Integrity
Homeowners often ask: “How do solar panels affect roof durability?”
-
Proper flashing prevents leaks: Without it, water intrusion may require solar roof replacement.
-
Correct conduit installation keeps wiring stable in high winds.
-
Regular inspections ensure the roof pitch for solar panels and mounts aren’t compromised.
When installed correctly, solar wiring should not shorten your roof’s lifespan.
Maintenance Tips for Solar Panel Wiring Roof Systems
-
Annual Inspection: Check conduit, flashing, and sealant for cracks or leaks.
-
Wire Condition: Look for fraying or rodent damage in attics.
-
Grounding Check: Confirm all clamps and lugs remain tight.
-
Post-Storm Check: Inspect roof penetrations after severe weather.
-
Professional Testing: Every 3–5 years, have an electrician test continuity and resistance.
Pros and Cons of DIY Solar Panel Wiring Through Roof
Pros
-
Lower installation costs.
-
Full control over your project.
-
Great learning experience.
Cons
-
Risk of leaks if flashing isn’t sealed properly.
-
Electrical hazards if codes aren’t followed.
-
May void warranties or insurance without professional approval.
🔌 Step-by-Step Wiring Diagram Outline
1. Solar Panels on Roof
⬇️ PV Wire → (positive/negative cables)
2. Roof Flashing & Conduit
⬇️ Conduit passes through roof penetration (sealed with flashing + caulk)
3. Attic / Interior Run
⬇️ Wires pulled through conduit → secured along rafters with straps
4. Combiner Box (if multiple panels)
⬇️ Combines strings of panels into a single feed
5. Inverter
⬇️ Converts DC → AC
6. AC Disconnect / Breaker Box
⬇️ Connects safely to the home’s electrical panel
7. Grounding
↘️ Bonding jumpers → Roof mounts → Grounding rod in soil
FAQs About Solar Panel Wiring Roof Systems
1. Do I need a permit for DIY solar panel wiring through the roof?
Yes. Most U.S. municipalities require permits for solar roof installation, even for DIY wiring. Always check with your local building department before drilling into your roof.
2. What type of wire is best for solar panels on roof systems?
Use UL-listed PV wire designed for outdoor, high-voltage use. Typical sizes are 10–12 AWG, depending on system capacity. This ensures safety and efficiency for rooftop wiring.
3. How do I prevent leaks when wiring through a roof?
Install proper roof flashing kits and seal with roof-safe caulk. For asphalt shingles, tuck flashing under shingle layers. For metal roofing, use standing-seam clamps with integrated flashing.
4. Can I run solar panel wiring without conduit?
No. NEC requires conduit for solar wiring through roofs. Conduit protects against UV, moisture, and mechanical damage, keeping your system safe and code-compliant.
5. Is grounding necessary for solar panels on metal roofs?
Yes. Grounding prevents shock, fire, and lightning damage. Bond solar panel mounts, rails, and roof sections to a dedicated ground rod.
6. Can I connect solar panels directly to my breaker box?
You can wire up to the inverter, but grid-tie connections should be done by a licensed electrician. Utilities often require inspections before activating the system.
7. How much money can I save by wiring solar panels myself?
DIY wiring may save $1,000–$3,000 in labor costs. However, mistakes can lead to roof damage, failed inspections, or voided warranties. Weigh savings against risks.
DIY Solar Wiring with Safety in Mind
DIY solar projects can be rewarding, but solar panel wiring roof systems demand extra care. With the right tools, knowledge, and respect for safety codes, you can reduce installation costs while powering your home with clean energy.
If you’re new to solar roofing, start small—maybe with a portable or off-grid setup—before tackling a full roof penetration. And remember, partnering with a professional for inspections or final connections ensures your system is safe, efficient, and long-lasting.
Disclaimer
This article is for informational purposes only and should not be considered electrical, legal, or tax advice. Always follow NEC code requirements and consult a licensed electrician or solar installer before attempting solar panel wiring roof projects.

 Explore more: