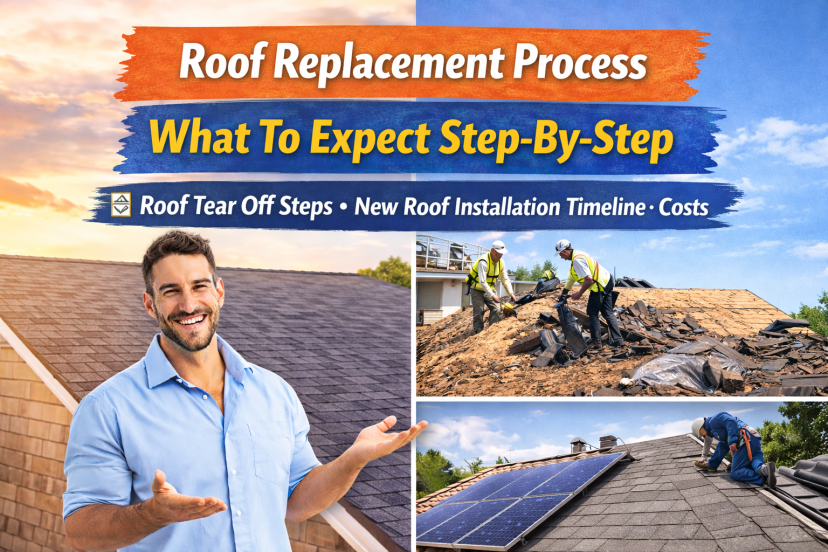
🏠 Roof Replacement Process: What To Expect Step-By-Step As A Homeowner
⚡ Why Understanding The Roof Replacement Process Matters
Replacing your roof is one of the biggest home improvement projects you’ll ever take on. Whether your goal is to protect your home, lower energy bills, or prepare for solar panels, knowing the roof replacement process ahead of time can reduce stress, prevent surprises, and help you make smarter decisions.
Many U.S. homeowners feel anxious about noise, timelines, costs, and what happens to their home during construction. This day-by-day walkthrough explains exactly what to expect—from the first inspection to the final cleanup—so you can feel confident and prepared.
🏠 Overview: The Roof Replacement Process At A Glance
Before diving into daily details, here’s a high-level look at the roof replacement process.
✅ Typical Project Timeline
-
Pre-inspection and material selection
-
Scheduling and permitting
-
Roof tear-off steps
-
Deck inspection and repairs
-
New roof installation
-
Final inspection and cleanup
Most residential roof replacements take 1–3 days, depending on size, materials, and weather.
🔍 Step 1: Inspection, Estimates, And Planning
Every successful roof replacement process starts with a thorough evaluation.
🏠 What Contractors Check
-
Shingle condition and leaks
-
Decking integrity
-
Ventilation and flashing
-
Gutter and drainage issues
💰 Cost Estimates And Options
-
Material choices (asphalt, metal, tile)
-
Labor and disposal costs
-
Ventilation or insulation upgrades
💡 Pro tip: If you’re considering solar panels, this is the best time to design a solar-ready roof.
📄 Step 2: Permits, Scheduling, And Prep
🏠 Permits And Local Codes
Most U.S. cities require permits for roof replacement. Your contractor typically handles this, ensuring compliance with building codes.
✅ Homeowner Preparation Checklist
-
Move vehicles away from the house
-
Protect attic items from dust
-
Secure pets and valuables
-
Notify neighbors about noise
Good preparation keeps the roof replacement process smooth and predictable.
🧹 Day 1: Roof Tear Off Steps Explained
The first major construction phase involves removing the old roof.
🏠 Roof Tear Off Steps
-
Shingles and underlayment removed
-
Nails and debris cleared
-
Old flashing removed
This phase is noisy but necessary. Proper tear-off ensures the new roof installs correctly and lasts longer.
⚠️ Why Tear Off Matters
-
Reveals hidden damage
-
Prevents trapped moisture
-
Protects manufacturer warranties
🪵 Day 1–2: Roof Deck Inspection And Repairs
Once the old roof is removed, contractors inspect the decking.
🔍 What They Look For
-
Rot or water damage
-
Soft or sagging plywood
-
Structural issues
Any damaged sections are replaced before continuing the new roof installation timeline.
🧱 Day 2: Underlayment, Flashing, And Protection
🏠 Key Components Installed
-
Ice and water shield (critical in colder states)
-
Synthetic or felt underlayment
-
New flashing around chimneys and vents
These layers protect your home from leaks and improve durability.
🔨 Day 2–3: New Roof Installation Timeline
Now the visible transformation begins.
🏠 New Roof Installation Steps
-
Starter shingles installed
-
Main roofing material laid
-
Ridge caps and finishing details added
The new roof installation timeline depends on the material choice:
-
Asphalt shingles: 1–2 days
-
Metal roofing: 2–4 days
-
Tile roofing: 3–7 days
🌬️ Roof Ventilation And Energy Efficiency Upgrades
Modern roof replacement process projects often include ventilation improvements.
🔋 Why Ventilation Matters
-
Reduces attic heat buildup
-
Lowers cooling costs
-
Extends roof lifespan
Proper ventilation also supports solar panel performance and Energy Star-rated roofing systems.
☀️ Solar Compatibility During Roof Replacement
Replacing your roof is the ideal time to plan for solar.
🔋 Solar-Ready Roof Benefits
-
Longer roof life than solar panels
-
Proper flashing and mounting zones
-
Improved ROI on solar investment
While solar installation qualifies for the Federal Solar Tax Credit, roof upgrades that support energy efficiency can improve overall system performance.
🧹 Final Day: Cleanup, Inspection, And Walkthrough
✅ What Happens At The End
-
Magnetic nail sweep of the yard
-
Debris removal
-
Final inspection by the contractor
-
Permit sign-off (if required)
You’ll receive warranty documentation and maintenance recommendations before project close-out.
💰 Cost Breakdown: What Homeowners Pay For
| Cost Component | Typical Range |
|---|---|
| Materials | $4,000–$12,000 |
| Labor | $3,000–$8,000 |
| Tear off & disposal | $1,000–$3,000 |
| Repairs & upgrades | Varies |
Total costs depend on size, materials, and region, but understanding the roof replacement process helps prevent budget surprises.
🏠 Long-Term Savings And ROI
💰 Financial Benefits
-
Lower energy bills
-
Increased home value
-
Reduced maintenance costs
A properly installed roof can deliver decades of protection and improved efficiency.
👷 When To Call A Professional
Contact a licensed roofing or solar professional if:
-
Your roof is over 15–20 years old
-
You see leaks or sagging
-
Energy bills are rising unexpectedly
-
You’re planning a solar installation
-
Your insurance requires documentation
Professional guidance ensures your roof replacement process meets code and performance standards.
Roofing Insulation Insurance Tips
Roofing insulation plays a key role in energy efficiency, comfort, and insurance protection. Proper insulation helps regulate attic temperatures, reducing heat buildup in summer and moisture problems in winter.
Many insurance providers look favorably on well-insulated roofs because they lower the risk of mold, ice dams, and structural damage. To protect coverage, keep documentation of insulation upgrades, use code-compliant materials, and schedule professional inspections after major work.
Improving insulation may also qualify you for lower energy bills, longer roof lifespan, and potential insurance discounts, depending on your provider and local requirements.
❓ FAQs: Roof Replacement Process
1. How long does the roof replacement process take?
Most homes take 1–3 days, depending on size and materials.
2. Will I need to leave my home?
No. Most homeowners stay home during replacement.
3. Are roof tear-off steps always required?
Yes, a full tear-off is recommended for proper installation and warranty protection.
4. Can bad weather delay installation?
Yes. Rain or high winds may pause the project for safety.
5. Can I install solar after replacing my roof?
Yes, and it’s strongly recommended to replace aging roofs before solar.
6. How noisy is roof replacement?
Expect loud noise during the tear-off and installation hours.
7. Does insurance cover roof replacement?
It may, depending on the damage caused and policy terms.
✅ Conclusion: A Clear Plan Makes Roof Replacement Stress-Free
Understanding the roof replacement process gives you control, confidence, and peace of mind. From tear-off to final inspection, knowing what happens each day helps you plan, budget, and make energy-smart choices—especially if solar is in your future.
🏠 Next step: Schedule a professional roof inspection to get accurate pricing, timelines, and solar-ready recommendations for your home.
⚠️ Disclaimer
Costs, timelines, and incentives vary by location and roof condition. Always consult a licensed roofing or solar professional before starting a roof replacement project.
 Explore more:
- How To Prevent Roof Leaks Before They Start
- Wind Damage to the Roof
- Hail Damage To Roof: How To Spot It & File A Claim