Solar Panel Inverter Installation Guide: Everything U.S. Homeowners Need to Know

Why Inverter Installation Is the Heart of Your Solar System
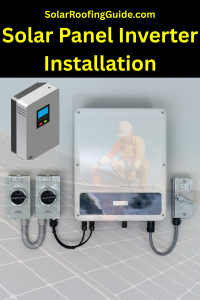
When U.S. homeowners think about solar energy, the focus is usually on the panels on the roof. But without a properly installed inverter, your solar power system won’t work at all. The inverter is the critical device that transforms the direct current (DC) from your panels into alternating current (AC), the electricity your home actually uses. If you’re considering solar roofing or already comparing solar roofing companies near you, understanding solar panel inverter installation can help you cut costs, make informed choices, and ensure long-term energy independence.
What Is a Solar Inverter and Why Does It Matter?
An inverter acts as the “translator” between your roof-mounted solar panels and your home’s electrical system. Without it, you’d have unusable energy sitting on your roof.
Key Functions of a Solar Inverter:
-
Converts DC to AC power
-
Optimizes system efficiency
-
Monitors energy production
-
Protects against electrical faults
Choosing the right inverter type and ensuring correct installation are just as important as picking the best roof for solar panels or calculating your solar roof cost estimate.
Types of Inverters for Residential Solar Roofing
Before you learn the installation process, you need to know which inverter type best suits your roof and energy needs.
1. String Inverters
-
How it works: One central inverter connects to all solar panels in a “string.”
-
Best for: Homes with consistent sun exposure and minimal shading.
-
Pros: Cost-effective, simple design.
-
Cons: If one panel underperforms, the whole system suffers.
2. Microinverters
-
How it works: Each solar panel has its own mini inverter.
-
Best for: Roofs with shading issues, tile roof solar panels, or complex roof pitches.
-
Pros: Panel-level optimization, better monitoring, longer warranties.
-
Cons: Higher upfront costs.
3. Power Optimizers (Hybrid)
-
How it works: It is installed at each panel but paired with a central inverter.
-
Best for: Compromised shading conditions, but where cost matters.
-
Pros: Efficiency + affordability balance.
-
Cons: Slightly more complex system.
Step-by-Step Solar Panel Inverter Installation Guide
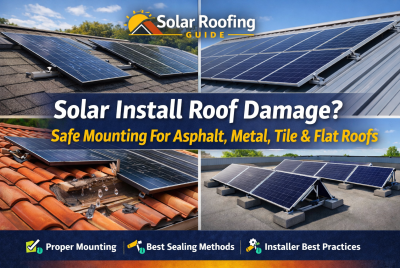
1. Assess Roof and Electrical Readiness
-
Confirm your roof is strong enough. Asphalt shingles, metal, and flat roofs each require specific mounting.
-
A roof replacement may be necessary if your roof is near the end of its lifespan.
-
Verify compatibility with your electrical panel.
2. Mount Solar Panels
While this step is about the panels themselves, it directly impacts inverter placement. Proper solar panel roof mounts are crucial for safety and efficiency.
3. Select Proper Inverter Location
-
Install in a cool, shaded, and ventilated area (garage, basement, or shaded exterior wall).
-
Avoid direct sun and wet environments.
4. Wiring the Panels to the Inverter
-
Connect the DC wires from the solar panels on your roof to the inverter input.
-
Use appropriate conduit to protect cables, especially on flat roof solar panels or metal roofs.
5. Connect the Inverter to the Main Service Panel
-
Link the inverter’s AC output to your electrical service panel.
-
Install a dedicated circuit breaker for solar energy input.
6. Grounding and Safety Checks
-
Ensure all metal components are grounded.
-
Install safety disconnect switches for emergency shutdown.
7. Utility Approval and Activation
-
Utility companies require inspections before grid connection.
-
Once approved, activate your inverter and monitor energy production through its digital interface.
Common Mistakes to Avoid in Solar Panel Inverter Installation
-
Placing inverters in direct sunlight → overheats and reduces lifespan
-
Using undersized wiring → energy loss and fire hazards
-
Ignoring roof compatibility → premature leaks or damage
-
Skipping professional inspection → utility rejection
Costs and Warranties: What U.S. Homeowners Should Expect
-
String Inverters: $1,000–$2,500 installed
-
Microinverters: $2,000–$4,000+ depending on system size
-
Power Optimizers: $1,500–$3,500
Warranties:
-
String inverters: 10–12 years
-
Microinverters: 20–25 years
-
Optimizers: 20–25 years
When planning your solar roof installation, always factor inverter warranties into your solar roof cost estimate.
Solar Panel Inverter Installation and Roofing Considerations
-
Tile Roof Solar Panels: Microinverters reduce shading losses from uneven tile layouts.
-
Asphalt Shingle Solar Compatibility: Works well with all inverter types; string inverters are most common.
-
Solar Panels on Metal Roof: Lightweight panels + microinverters are an efficient combo.
-
Flat Roof Solar Panels: Require tilt mounts, making optimizer or microinverter systems ideal.
Solar Panel Inverter Maintenance Tips: Keeping Your System Running Smoothly
Your inverter is the heart of your solar power system. While solar panels can last 25–30 years with little upkeep, inverters usually have a shorter lifespan (10–25 years, depending on type). Regular maintenance is essential to maximize efficiency and avoid costly breakdowns.
1. Monitor Performance Regularly
-
Most modern inverters have built-in monitoring apps or digital displays.
-
Track daily, weekly, and monthly energy output. Sudden drops may signal wiring issues, shading problems, or inverter faults.
-
For string inverters, watch the overall system; for microinverters, check individual panel performance.
2. Keep the Inverter Clean and Dust-Free
-
Inverters installed in garages or basements can collect dust.
-
Wipe down exterior surfaces with a dry or slightly damp cloth (never open the unit).
-
Ensure vents and fans aren’t blocked—overheating can shorten inverter life.
3. Check for Warning Lights and Error Codes
-
Inverter displays often show status indicators (green = good, red/orange = problem).
-
Don’t ignore error codes; contact your installer or inverter manufacturer for troubleshooting.
-
Common issues include grid disconnection, DC voltage fluctuations, or ground faults.
4. Inspect Electrical Connections Annually
-
Loose wiring can reduce efficiency and cause overheating.
-
Hire a licensed electrician every 12–18 months to check connections, breakers, and safety switches.
-
Proper grounding is critical, especially for metal roof solar panels or flat roof solar systems.
5. Protect Against Overheating
-
Inverters should be in shaded, ventilated areas.
-
Avoid exposure to direct sunlight or extreme cold.
-
If outdoors, install a protective enclosure rated for U.S. weather conditions (NEMA-rated housing).
6. Schedule Professional Servicing
-
Even if everything seems fine, schedule a professional checkup every 3–5 years.
-
Certified solar technicians will test voltage, insulation resistance, and confirm compliance with NEC (National Electrical Code) standards.
7. Replace Before Failure
-
Don’t wait for your inverter to die completely.
-
Most manufacturers recommend replacing string inverters after 10–12 years, while microinverters and optimizers can last 20–25 years.
-
Upgrading early can improve efficiency with newer technology.
8. Protect Against Power Surges
-
Install surge protection devices to safeguard inverters from lightning strikes or grid surges.
-
Especially important in U.S. regions prone to thunderstorms (Florida, Texas, Midwest).
9. Maintain Roof Integrity
-
During maintenance visits, ensure roof mounts, flashing, and wiring conduits are intact.
-
Prevent leaks or wear around asphalt shingles, tile roofing, or solar shingles to extend both the roof and the inverter life.
✅ Pro Tip for U.S. Homeowners: Most inverter manufacturers (like Enphase, SolarEdge, SMA) offer extended warranties. Investing in one can save thousands in replacement costs and guarantee professional servicing.
Seasonal Solar Panel Inverter Maintenance Checklist
🌸 Spring
-
Inspect inverter vents for dust or pollen buildup.
-
Review inverter monitoring data for winter underperformance.
-
Check wiring insulation for cracks caused by cold weather.
-
Ensure no new tree growth is shading panels (affects inverter load).
☀️ Summer
-
Keep the inverter shaded and well-ventilated to prevent overheating.
-
Listen for unusual fan noises (common in hot weather).
-
Wipe the inverter exterior with a soft cloth to remove dirt or cobwebs.
-
Verify surge protection devices are working (especially in storm-prone states).
🍂 Fall
-
Clean dust and debris around the inverter vents after the dry summer months.
-
Schedule a professional inspection if it’s been 12 months since the last check.
-
Review monitoring logs for consistent production before winter.
-
Confirm roof flashing and mounts are secure before the rainy/snowy season.
❄️ Winter
-
Check the inverter display regularly for error codes during cold snaps.
-
Make sure the inverter is safe from ice buildup or water leaks.
-
Verify that heaters or HVAC equipment aren’t causing electrical interference.
-
Record daily output levels to ensure the system is operating normally despite shorter days.
✅ Quick Tip: In the U.S., most homeowners benefit from one professional service every 1–2 years, plus DIY seasonal checkups. Keeping logs of inverter readings and errors makes troubleshooting faster if issues arise.
Pros and Cons of Installing Inverters Yourself vs. Hiring Professionals
DIY Solar Panel Inverter Installation
-
Pros: Lower cost, personal satisfaction.
-
Cons: Risk of mistakes, safety hazards, and no warranty protection.
Professional Installation
-
Pros: Code compliance, warranty protection, safe grid connection.
-
Cons: Higher upfront costs.
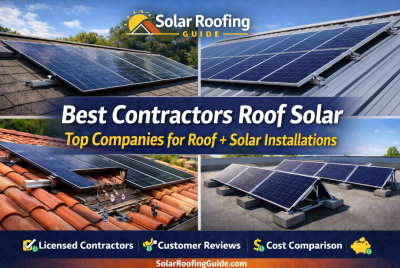
For most homeowners, hiring solar roofing companies near you ensures long-term reliability.
7 FAQs About Solar Panel Inverter Installation
1. How long does solar panel inverter installation take?
Most professional installations take 1–2 days, depending on system size, roof type, and electrical complexity. Utility inspection and approval may add a few more days before activation.
2. Can I install a solar inverter myself?
While DIY is possible, it’s not recommended. Inverter installation involves electrical work, grounding, and utility approvals. Professional installers ensure safety, compliance, and warranty protection.
3. What is the best inverter for U.S. homes?
Microinverters are ideal for roofs with shading or complex layouts, while string inverters work well for sunny, simple roof designs. Power optimizers offer a middle ground between efficiency and affordability.
4. How long do solar inverters last?
String inverters typically last 10–12 years, while microinverters and optimizers can last 20–25 years. Regular maintenance and proper placement in a shaded area extend lifespan.
5. Does solar panel inverter installation affect roof life?
When done correctly, it should not shorten roof life. Using proper mounts and waterproof flashing ensures panels and inverters don’t cause leaks or premature roof damage.
6. How much does a solar inverter cost in the U.S.?
Homeowners can expect to pay $1,000–$4,000, depending on inverter type and system size. This includes equipment and installation, but not the full solar roofing project.
7. Can I use one inverter for multiple solar panels?
Yes. String inverters and power optimizers connect multiple panels together. Microinverters, however, require one per panel, making them better for roofs with varied shading.
Conclusion: Take Control of Your Energy Future
Your solar panels are only as strong as the inverter powering them. With the right solar panel inverter installation, you’ll maximize energy output, lower your utility bills, and add long-term value to your home. Whether you choose a DIY route or hire professionals, understanding the process helps you make smarter decisions about your solar roofing system.
Disclaimer
This article is for informational purposes only. Solar panel inverter installation involves electrical and roofing work that can be hazardous. Always consult licensed electricians, roofing professionals, and your local utility before beginning installation.
 Explore more: