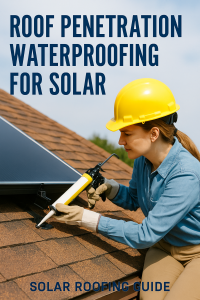
Roof Penetration Waterproofing for Solar: The Complete U.S. Homeowner’s Guide
🏠 Protecting Your Roof While Powering Your Home
Installing solar panels is one of the best ways to reduce your energy bills and make your home more sustainable. But there’s a critical detail many homeowners overlook: every time a solar mount is drilled into your roof, it creates a penetration point — and if not sealed correctly, that’s an open invitation for water leaks, rot, and costly roof damage.
Proper roof penetration waterproofing for solar ensures your system performs efficiently and your home stays dry for decades. This guide breaks down how professional installers protect your roof using flashing, sealants, and leak-prevention systems, and what every U.S. homeowner should know before going solar.
⚙️ What Are Roof Penetrations in Solar Installations?
When solar panels are mounted on your roof, they need structural attachments called solar mounts or stanchions. Each mount requires drilling through the roofing material — creating small but crucial openings known as roof penetrations.
Common Penetration Types:
-
Mounting brackets for racking systems
-
Conduit entry points for electrical cables
-
Flashing installations around mounts and vents
-
Hardware for grounding and sealing systems
Each penetration must be properly sealed and waterproofed to prevent leaks over time. Even one missed or poorly sealed mount can allow water to infiltrate your roof deck.
💧 Fact: The average solar array on a residential home requires between 20 and 40 roof penetrations, depending on the system size and layout.
🧰 Why Waterproofing Roof Penetrations Is So Important
1. Leak Prevention
Without adequate waterproofing, moisture seeps into your attic, causing insulation damage, rot, or even mold growth.
Proper sealing stops this before it starts.
2. Maintains Roof Warranty
Most roofing manufacturers — like GAF, CertainTeed, and Owens Corning — require that solar installers use certified waterproofing methods to preserve your warranty.
3. Extends Roof Life
A well-sealed roof maintains its structural integrity and prevents premature aging from moisture exposure.
4. Protects Solar Investment
Leaks can lead to costly system removal and reinstallation. A watertight installation ensures uninterrupted performance and warranty coverage.
✅ Tip: Always choose NABCEP-certified solar installers who follow the National Roofing Contractors Association (NRCA) waterproofing standards.
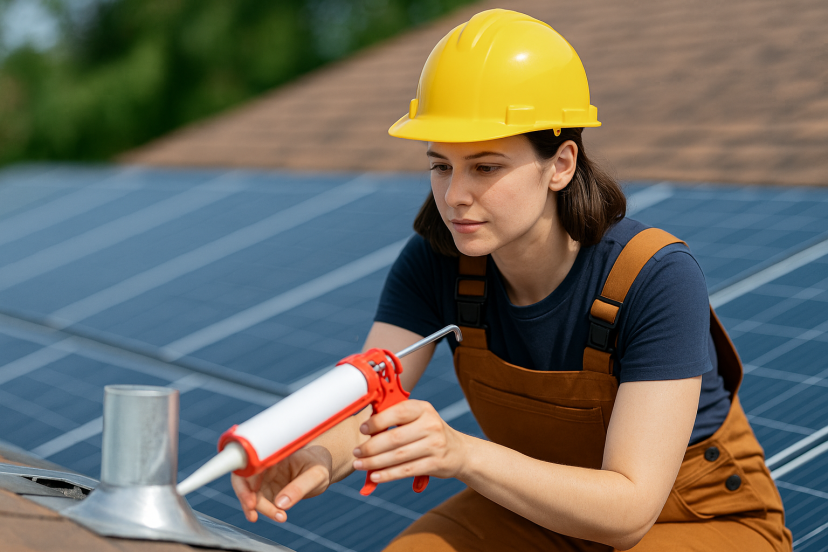
🔩 Flashing and Sealant — The Secret to Leak-Free Solar Mounts
Waterproofing starts with flashing — a thin, weatherproof metal or plastic barrier that diverts water away from penetrations.
🧱 Step-by-Step Waterproofing Process
Step 1: Mount Placement
Installers locate roof rafters (structural beams) and pre-drill holes for solar mounts.
Step 2: Applying Sealant
A high-grade solar sealant (such as silicone or butyl-based adhesive) is applied inside and around each hole. This forms the first layer of waterproof defense.
Step 3: Installing Flashing
Flashing is slid under the upper layer of shingles or tiles, directing water away from the penetration site. Aluminum or stainless-steel flashings are the most durable.
Step 4: Securing Mounts
The solar mount is bolted through the flashing and into the rafter. Additional sealant is added around bolts to reinforce the barrier.
Step 5: Secondary Waterproofing Layer
Installers apply extra UV-resistant sealant over exposed hardware for long-term durability.
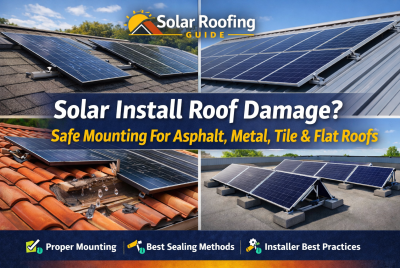
☀️ Different Roof Types Require Different Waterproofing Methods
Every roofing material handles penetrations differently. Here’s how professionals adapt their waterproofing approach:
| Roof Type | Waterproofing Method | Notes |
|---|---|---|
| Asphalt Shingle Roofs | Standard metal flashing under shingles with butyl sealant | Most common and cost-effective |
| Tile Roofs | Tile-replacement mounts or elevated flashing systems | Prevents cracking or leaks between tiles |
| Metal Roofs | Clamp-on or seam-mounted brackets — no drilling needed | Excellent for leak prevention |
| Flat Roofs (TPO, EPDM) | Chemically bonded mounts and flashing boots | Ideal for commercial and modern homes |
💡 Pro Tip: For flat or low-slope roofs, installers use “chem-curb” waterproofing — a sealed barrier that encapsulates mounts for extra leak protection.
💧 Types of Sealants and Flashing Used in Solar Roofing
🧴 Best Sealants for Roof Penetrations
-
Silicone Sealant – Flexible and long-lasting for all climates.
-
Polyurethane Sealant – Strong adhesion and ideal for metal flashing.
-
Butyl Rubber Sealant – Perfect for tile and uneven surfaces.
🔩 Common Flashing Materials
-
Aluminum flashing – Lightweight and corrosion-resistant.
-
Stainless steel flashing – Best for longevity and coastal climates.
-
EPDM or TPO boots – Used for conduit and electrical penetrations.
✅ Maintenance Tip: Inspect sealants every 3–5 years — UV rays and temperature shifts can cause them to degrade over time.
🔋 Waterproofing Solar Conduits and Wiring
Water doesn’t just enter through mounts — it can also sneak in where electrical conduits enter your roof.
Proper Conduit Sealing Includes:
-
Using compression fittings to create airtight seals
-
Applying silicone caulk around the roof entry points
-
Installing flashing boots around conduits
-
Sealing all junction boxes with waterproof gaskets
⚡ Safety Note: Always ensure your electrician uses NEMA 3R-rated conduit fittings designed for outdoor waterproof performance.
🧾 Cost of Roof Penetration Waterproofing for Solar
Waterproofing is typically included in the cost of your solar installation. However, costs can vary based on roof type and complexity.
| Roof Type | Average Waterproofing Cost (per penetration) | Notes |
|---|---|---|
| Asphalt Shingle | $20–$35 | Easiest and fastest installation |
| Tile Roof | $35–$60 | Requires replacement or adjustable mounts |
| Metal Roof | $15–$25 | Often non-penetrative (clamp-based) |
| Flat Roof | $25–$50 | May need chemical sealants or flashing boots |
💰 Savings Insight: Investing in high-quality flashing and sealant upfront can save you hundreds in future roof repair costs.
🌦️ Maintenance and Leak Prevention After Solar Installation
Even when properly installed, solar roof penetrations need occasional inspection — especially after severe weather or seasonal changes.
Routine Maintenance Checklist:
-
Inspect mounts, flashing, and sealants annually
-
Clear debris around solar panels and mounts
-
Check for water stains or dampness in your attic
-
Schedule a professional inspection every 2–3 years
☀️ Energy Tip: Combine solar maintenance visits with roof inspections — many installers offer discounted combo packages.
🏗️ Solar Mounting Innovations That Reduce Roof Penetrations
Newer technologies make roof penetrations less invasive or unnecessary altogether:
1. Rail-Less Mounting Systems
Use fewer connection points by attaching directly to shingles or metal seams.
2. Ballasted Solar Mounts
Used on flat roofs — panels sit on weighted supports instead of penetrating the roof membrane.
3. Integrated Solar Roofs
Systems like Tesla Solar Roof and CertainTeed Solstice Shingles replace traditional roofing materials with solar tiles, eliminating separate mounts entirely.
🔋 These options provide superior waterproofing but come at a higher upfront cost.
🧩 When to Call a Professional Roofing or Solar Installer
You should contact a certified professional when:
-
Your roof is older than 15 years
-
You see stains or leaks near solar mounts
-
Your roof has tile, slate, or specialty materials
-
You plan to add more panels or upgrade your system
-
You need to reapply sealant or replace flashing
Look for:
-
NABCEP-certified solar installers
-
Licensed roofing contractors familiar with solar integration
-
Companies offering dual roof + solar warranties
📞 Tip: Ask your installer for a “penetration report” — it details how each mount is sealed and guarantees leak protection.
❓ Frequently Asked Questions (FAQs)
1. Does installing solar panels cause roof leaks?
No — when installed correctly using professional flashing and sealant, solar panels will not cause leaks. Issues arise only from poor workmanship or damaged roofing.
2. How many holes are drilled for solar panels?
A typical 6 kW system uses 20–40 penetrations, depending on the roof slope and panel layout.
3. What type of sealant is best for roof penetrations?
Silicone or polyurethane-based sealants are preferred for their flexibility and long-term UV resistance.
4. Can waterproofing fail over time?
Yes — exposure to sun, rain, and temperature changes can degrade materials. Inspect sealants and flashing every 3–5 years.
5. What if my roof already leaks after solar installation?
Contact your installer immediately. Reputable companies provide workmanship warranties covering water intrusion.
6. Are there waterproof solar mounts that don’t require drilling?
Yes — standing seam clamps and ballasted mounts for flat roofs require no penetrations at all.
7. Will waterproofing void my roof warranty?
No, as long as manufacturer-approved flashing systems are used. Always verify your installer works with roofing-certified materials.
🌤️ Conclusion: Secure Your Solar Investment with Professional Waterproofing
A strong, leak-free roof is the foundation of a successful solar installation. With the right flashing, sealant, and mounting techniques, you can enjoy decades of clean energy without risking water damage or costly repairs.
If you’re planning to go solar or upgrade your roof, ask your installer for a roof penetration waterproofing plan. It’s a small step that protects one of your home’s biggest investments — your roof.
⚠️ Disclaimer
Costs, methods, and warranties vary by location and roof type. Always consult a licensed solar or roofing professional for your specific home before installation.
 Explore more:
- Best Roof Underlayment for Solar Panels
- Standing Seam Metal Roof Guide
- Roof Coatings for Solar Panels