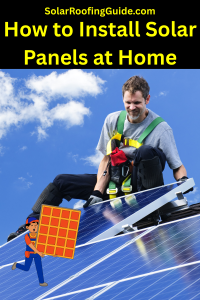
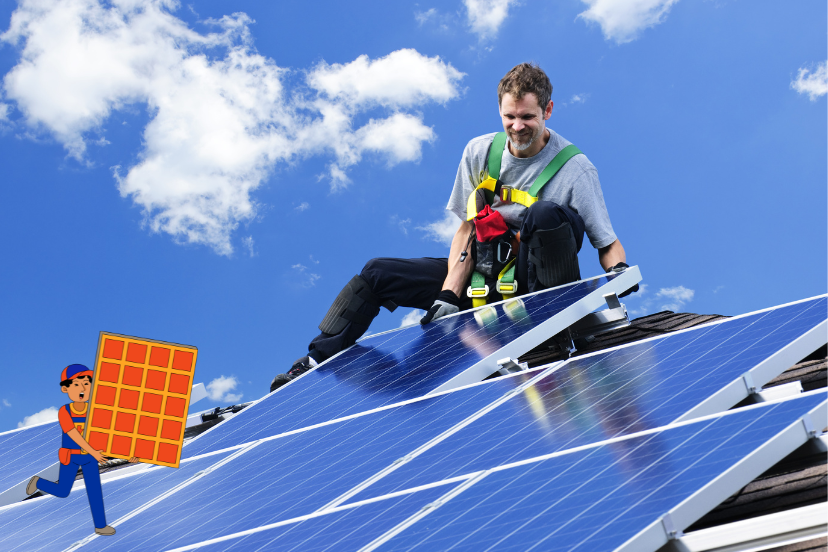
How to Install Solar Panels at Home: DIY Guide
Why DIY Solar Is on the Rise
Are you tired of sky-high energy bills or worried about your family’s energy future? You’re not alone. Across the U.S., more homeowners are discovering that learning how to install solar panels at home can be one of the smartest investments they make. Not only can it save thousands of dollars over the life of the system, but it also offers freedom from rising utility rates and a big step toward energy independence.
This solar roofing guide breaks down everything you need to know — from checking your roof to wiring your panels — so you can confidently decide whether DIY solar is right for your home in 2025.
Step 1: Assess Your Roof Before Installation
Before thinking about panels, make sure your roof is ready.
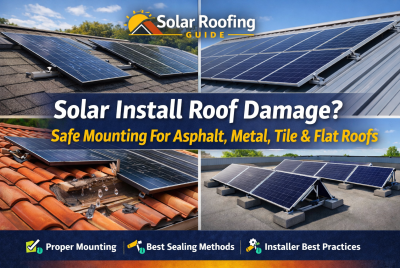
Best Roof for Solar Panels
-
Asphalt shingles: Affordable and compatible with most solar panel roof mounts.
-
Standing-seam metal roofing: Allows clamps without drilling, making it ideal for solar.
-
Tile roof solar panels: Possible, but requires special brackets and higher labor costs.
-
Flat roof solar panels: Work well with tilt racks to achieve the right angle.
Check your roof age too. If it’s older than 15 years, consider a solar roof replacement before installation. This saves you from having to remove panels later.
Step 2: Calculate Solar Needs & Costs
Every home is different. To size your system:
-
Look at your utility bills – Average kilowatt-hour (kWh) usage tells you how much power you need.
-
System size – A typical U.S. home requires a 6–8 kW system.
-
Solar roof cost estimate – DIY equipment packages can cost $10,000–$15,000, while professional installs often run $20,000–$30,000 before incentives.
-
Tax credits – The U.S. federal solar tax credit offers up to 30% back on qualified systems.
Step 3: Choose Your Solar Equipment
A DIY solar project needs more than panels. Here’s what to include:
-
Solar panels (monocrystalline are most efficient for residential roofs).
-
Inverter (converts DC power to AC for home use).
-
Solar panel roof mounts (flush mounts for pitched roofs, tilt mounts for flat roofs).
-
Wiring & combiner box for electrical connections.
-
Battery storage (optional, for backup power).
-
Monitoring system (track production through an app).
If you’re comparing solar shingles vs panels, keep in mind: shingles blend into the roof but are currently more expensive and less efficient than traditional panels.
Step 4: Plan Your Roof Layout
Placement is everything.
-
Roof orientation: South-facing roofs are best in the U.S.
-
Roof pitch for solar panels: Ideal angle is 30–40 degrees.
-
Shading: Avoid areas blocked by trees, chimneys, or nearby buildings.
-
Ventilation: Keep panels away from vents, skylights, and ridgelines.
Tip: Use tools like Google Project Sunroof or ask solar roofing companies near me for a sunlight analysis.
Step 5: Install Mounts and Racking
-
Mark where solar panel roof mounts will go, making sure they align with rafters.
-
Drill pilot holes and use lag bolts with flashing to prevent leaks.
-
Attach rails or racking systems, checking for proper alignment.
Proper flashing is critical for protecting against water damage. If unsure, consult a roofing contractor to avoid problems with how solar panels affect roof integrity.
Step 6: Place Solar Panels on Roof
-
Lift panels carefully and secure them to the racking system.
-
Use clamps and brackets designed for your roofing type.
-
Double-check alignment and tilt angle.
For solar panels on metal roof, specialized clamps eliminate the need for roof penetration, reducing leak risk.
Step 7: Wiring and Electrical Connections
This is the most technical step. You’ll need to:
-
Connect panels in series or parallel (depending on system design).
-
Run wiring through a combiner box.
-
Connect to the inverter.
-
Link inverter output to your home’s electrical panel.
⚠️ Important: Electrical work must follow National Electrical Code (NEC) standards. In most U.S. states, you’ll need a licensed electrician to handle final connections and inspections.
Step 8: Connect to the Grid or Battery
-
Grid-tied systems: Excess power goes back to the grid, often earning credits through net metering.
-
Off-grid systems: Require batteries to store energy.
-
Hybrid systems: Combine grid connection with battery backup for reliability.
Step 9: Final Inspection and Activation
Before turning on your system, local inspectors will check:
-
Mounting and wiring safety
-
Fire code compliance
-
Utility approval
Once approved, flip the switch — and start producing your own clean energy.
Solar Roof Maintenance Tips
Proper maintenance ensures your solar panels continue to perform efficiently and your roof remains in good condition. Here’s a comprehensive guide:
1. Regular Cleaning
-
Frequency: Clean panels 1–2 times per year, more often in dusty or pollen-heavy areas.
-
Method: Use a soft brush or sponge with water. Avoid abrasive materials that could scratch the panel surface.
-
Tip: Avoid using high-pressure washers, as they can damage mounts or seals.
2. Inspect Mounts and Flashing
-
Check all solar panel roof mounts for tightness and rust.
-
Ensure flashing around the mounts is intact to prevent leaks.
-
Look for any signs of water pooling or shingles shifting.
3. Monitor Energy Production
-
Use your inverter or a solar monitoring app to track output.
-
Sudden drops in energy production can indicate:
-
Dirt or debris on panels
-
Shading from new tree growth
-
Wiring or inverter issues
-
4. Trim Nearby Trees
-
Overhanging branches can shade panels, reducing efficiency by up to 20–30%.
-
Remove branches that could drop leaves, sap, or debris on panels.
5. Seasonal Maintenance
-
Spring: Remove pollen and dust buildup. Inspect mounts after winter storms.
-
Summer: Check for overheating issues and monitor performance during heatwaves.
-
Fall: Remove leaves and debris from the roof. Inspect roof for signs of wear.
-
Winter: Clear snow if safe to do so; use a roof rake to avoid walking on panels.
6. Professional Inspection
-
Hire a solar roofing company every 2–3 years for a full system check:
-
Electrical wiring and connections
-
Mount integrity
-
Inverter performance
-
Roof condition under panels
-
7. Avoid DIY Electrical Repairs
-
While cleaning and visual inspections are safe, never attempt electrical repairs yourself.
-
Always hire a licensed electrician for wiring, inverter, or grounding issues.
8. Check Your Warranties
-
Review panel, inverter, and roof warranties to ensure maintenance requirements are met.
-
Many warranties may be voided if panels aren’t inspected or cleaned regularly.
9. Prepare for Storms
-
Inspect panels after hail, heavy rain, or strong winds.
-
Look for cracks, loose mounts, or displaced panels.
10. Document and Track
-
Keep a maintenance log: cleaning dates, inspections, repairs, and energy production.
-
This helps with troubleshooting, insurance claims, and resale value.
Quick Tips Summary
-
Clean panels gently
-
Inspect mounts and flashing regularly
-
Monitor energy output
-
Trim trees and remove debris
-
Schedule professional inspections
-
Avoid DIY electrical repairs
-
Track maintenance in a log
💡 Pro Tip: Proper maintenance can extend panel lifespan from 25–30 years to 30+ years and improve efficiency by 5–10% annually.
🗓️ Solar Roof Maintenance Calendar for Homeowners
Keep your solar panels on roof and roofing system in top condition with this monthly, seasonal, and annual maintenance plan.
Monthly Tasks
-
📱 Monitor Energy Output – Check your inverter or solar app for unusual drops.
-
👀 Visual Inspection – Look for debris, leaves, or bird droppings on panels.
-
🌳 Check for New Shade – Ensure trees or new structures aren’t blocking sunlight.
Seasonal Tasks
Spring
-
🧼 Clean panels to remove dust, pollen, or dirt.
-
🪛 Inspect solar panel roof mounts and flashing for wear or corrosion.
Summer
-
🌡️ Track efficiency during heatwaves. High temperatures can slightly reduce output.
-
✂️ Trim trees to prevent new shading and leaf debris.
Fall
-
🍂 Remove leaves and other debris.
-
🏠 Inspect shingles or roof tiles under panels for damage.
Winter
-
❄️ Safely remove snow from panels using a roof rake or soft brush.
-
⚡ Check for storm damage after wind, ice, or hail events.
Annual Tasks
-
🧑🔧 Schedule a professional inspection with solar roofing companies near me:
-
Test wiring and inverter health
-
Check mounting integrity
-
Perform a full roof assessment
-
-
🔒 Review warranties for panels, inverter, and roof.
-
🧾 Update insurance policy to cover your solar system.
Every 2–3 Years
-
🧼 Deep clean panels with a professional service.
-
🪛 Inspect all mounts, flashing, and roof areas under panels.
-
💡 Evaluate whether the system is performing at peak efficiency and adjust if necessary.
When to Call a Professional Immediately
-
Sudden drops in energy output
-
Roof leaks around solar mounts
-
Cracked panels or broken mounts
-
Electrical sparks, burning smells, or inverter failure
✅ Quick Tips Summary
-
Regular cleaning and inspection prevent energy loss.
-
Trim trees and manage debris to avoid shading.
-
Schedule professional inspections every 2–3 years.
-
Document all maintenance tasks in a log.
💡 Pro Tip: Consistent maintenance can improve efficiency by 5–10% annually and extend your system’s life well beyond 25–30 years.
Pros and Cons of DIY Solar Roofing
How to install solar panels at home? Installing solar panels yourself can be rewarding, but it comes with both benefits and risks. Understanding these will help you decide if DIY solar is right for your home.
✅ Pros of DIY Solar Roofing
-
Lower Cost
-
DIY solar kits often cost 30–50% less than hiring professional installers.
-
You save on labor fees and can potentially recoup your investment faster.
-
-
Hands-On Learning Experience
-
Installing your own system gives you a deep understanding of how solar panels work on your roof.
-
You’ll know exactly where wiring and mounts are installed, which is helpful for maintenance.
-
-
Energy Independence
-
DIY solar allows homeowners to reduce reliance on the grid and cut electricity bills.
-
Combining panels with batteries can increase backup power during outages.
-
-
Flexibility in Equipment Choice
-
You can select panel brands, inverters, and mounts that fit your budget and roof type.
-
Compare solar shingles vs panels, or install a mix to match your home aesthetics.
-
-
Eligible for Incentives
-
Many U.S. federal and state incentives apply to DIY installations as long as you meet building codes and permit requirements.
-
-
Customizable System Size
-
DIY lets you size your system exactly to your energy needs without being limited by a company’s package offerings.
-
❌ Cons of DIY Solar Roofing
-
Technical Complexity
-
Installing panels involves electrical work, roof mounts, and sometimes cutting into shingles or flashing.
-
Mistakes can reduce efficiency or cause system failure.
-
-
Safety Risks
-
Working on roofs is dangerous; falls, ladder accidents, or electrical shocks are possible.
-
Improper installation can lead to roof leaks or structural damage.
-
-
Limited Warranty Coverage
-
Many solar panel manufacturers require professional installation for full warranty coverage.
-
DIY installations may void certain warranties or reduce insurance protection.
-
-
Time-Consuming
-
DIY solar can take several days to weeks, depending on your skill level and roof size.
-
Researching permits, inspections, and equipment adds to the timeline.
-
-
Permit and Inspection Requirements
-
Most U.S. cities and states require building permits and inspections.
-
Electrical connections often must be performed by a licensed electrician.
-
-
Potential for Costly Mistakes
-
Roof leaks, damaged panels, or wiring mistakes can be expensive to fix.
-
If you plan to sell your home, some buyers prefer professionally installed solar systems.
-
-
Limited Professional Support
-
Without a contractor, troubleshooting and maintenance guidance may be harder to access.
-
⚖️ Bottom line on How to Install Solar Panels at Home
DIY solar roofing is ideal for:
-
Homeowners with roofing and electrical experience
-
Those willing to invest time in research and careful installation
-
Budget-conscious homeowners who want hands-on control over their system
If you’re unsure, a hybrid approach works well:
-
DIY installation for mounting and panel placement
-
Hire a licensed electrician for final wiring and inspections
💡 Pro Tip: Many homeowners find that DIY solar is worth the effort only if they are confident in their skills and willing to follow all safety and code requirements. Otherwise, professional installation may offer a faster, safer, and warranty-protected solution.
7 FAQs About How to Install Solar Panels at Home
1. Can I legally install solar panels myself in the U.S.?
Yes, but most states require permits and inspections. Final electrical connections usually need a licensed electrician.
2. How much money can I save with DIY solar?
DIY kits can cost 30–50% less than professional installs. Expect to save $5,000–$15,000 depending on system size.
3. Do solar panels damage the roof?
No, not if installed correctly with flashing and proper mounts. Poor installation may cause leaks, which is why roof prep is critical.
4. How long do solar panels last?
Most panels last 25–30 years with minimal maintenance. Inverters may need replacement after 10–15 years.
5. What type of roof is easiest for solar?
Asphalt shingles and standing-seam metal roofs are the most solar-friendly and cost-effective.
6. Do I need batteries to use solar panels at home?
No. Grid-tied systems work without batteries. Batteries are optional for backup power or going fully off-grid.
7. How soon will solar panels pay for themselves?
In the U.S., the average payback period is 6–10 years, depending on electricity rates and incentives.
Conclusion: Is DIY Solar Right for You?
Learning how to install solar panels at home can unlock energy independence, long-term savings, and a greener lifestyle. If you’re comfortable with roofing and electrical work, a DIY installation could be your path to lower bills and greater control. If not, professional installers can still deliver strong returns with fewer headaches.
Either way, solar energy is one of the smartest investments U.S. homeowners can make in 2025.
Disclaimer
This article is for informational purposes only and should not be considered professional electrical or roofing advice. Always check local building codes, consult licensed electricians, and follow manufacturer instructions before attempting a DIY solar installation.
 Explore more:
- Cheapest Solar Panels for Small Houses
- Best Solar Panels for Home Use in 2025
- Portable Solar Panels for RV